


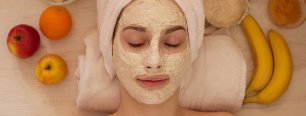
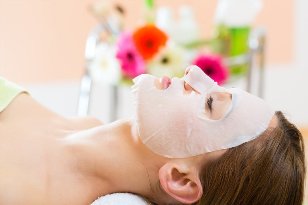
The cosmetic industry develops a wide variety of masks, both for professional salon and home use. Homemade masks from natural ingredients, however, will always take precedence over factory-made options.
After the age of 25, girls should start to take care of their facial skin, not only wash with clean water, but should nourish the skin with a variety of masks. Otherwise, inadequate care will manifest itself as wrinkles soon begin and skin condition significantly worsens.
What types of masks are there?
Usually masks are categorized according to the effect they create. There are different types of masks:
- nourishes, moisturizes, tightens and cleanses - they are designed to care for and maintain the skin in perfect condition;
- anti-inflammatory, whitening, anti-couperose - this group of masks fights obvious blemishes on the skin; Lifting, anti-aging mask
- - belongs to the anti-aging group and helps to stretch the face.
How to determine your skin type
Before choosing a mask, you need to define your skin type. In classical aesthetics, it is customary to distinguish between skin types:
- bold,
- dry,
- is normal,
- is combined.
Since the needs of different skin differ dramatically, it's a good idea to choose a homemade mask depending on your skin type.
As a rule, this is not a problem, as girls often pay attention to their looks and skin type can be easily identified even when looking at themselves in the mirror. However, sometimes difficulties arise. Therefore, to accurately determine your skin type at home, wash your face with regular neutral soap and don't use any products on it.
After about an hour and a half, put a absorbent tissue on the face well. Take a close look at the napkin and assess the skin's oily level:
- If there are traces of sebum all over the surface of the napkin, it means that the skin is not tight at all and you are oily.
- If the napkin leaves no trace, but the skin doesn't flake and doesn't feel tight right away, your skin type is normal.
- If there is no greasy stain on the napkin, but you feel a noticeable stretch, then your skin is dry.
- If there are dark marks between your napkin, forehead, nose, and chin, and on the area of the cheeks and temples, the skin leaves no marks (dry or normal), then the fat content distributionSuch unevenness indicates combination or combination skin types.
Applying a facial mask at home
A nourishing mask is needed to replenish the missing nutrients, vitamins and trace elements on the skin.
Formula # 1. Oily (honey) skin mask
A simple preparation made from 2 teaspoons of honey, 20 drops of lemon juice and 1 teaspoon of low-fat sour cream is ideal for oily skin. Mix all ingredients in a bowl until smooth, apply the resulting mixture to the face. Leave on for 20 minutes to half an hour, then rinse with warm water.
The mask will nourish the skin, making it even, radiant and beautiful.
Formula # 2. Dry skin mask
To treat dry skin at home, use these ingredients:
- 1 egg yolk,
- 2 teaspoons of milk
- 1 half teaspoon of fine oatmeal.
Pour oatmeal with very warm milk, let it steam (10-15 minutes). Floss the egg yolks with a fork and stir until the cotton dissolves. Apply the mixture to your face and let it sit for 20 minutes.
This soothing mask with the ability to penetrate deeply into the pores nourishes dry skin, reducing the feeling of stretch and flaking, leaving skin soft and smooth.
Formula # 3. Normal skin care mask
It is a big misconception that normal facial skin does not need nourishment and care, is saturated with vitamins. Nourishing masks are usually grape extracts that gently and carefully care for the skin, soothing the skin.
Crush 6-7 grapes of any white color (or last option is black), remove all the seeds and skin, combine the grape mass with 1 teaspoon of sour cream. Apply the mixture on your face, hold for 20-30 minutes, then rinse with warm water. The mask is so nourishing that even irritated skin can heal.
Home moisturizing mask
A natural moisturizing mask that keeps skin hydrated. Usually, moisture is needed in the summer and spring, when under the influence of ultraviolet radiation and ambient temperature some moisture is lost from the surface layers of the skin. Even slight dehydration can lead to a decrease in skin elasticity, wrinkles and flakiness.
Formula # 4. Oily skin moisturizing mask
The following recipe will help moisturize oily skin. Whip 1 egg white and mix with 20 ml of liquid honey until smooth. Add 1 heap of chopped oatmeal. Apply mask on face, leave on for 20 minutes. First, rinse with warm water, then rinse face with cold water. You can substitute the peels with potatoes or starch to help tighten pores and condition your skin.
Formula # 5. A moisturizing mask for dry skin
Dry is perfectly removed with the curd mask.
Dry skin especially needs to be moisturized, not just in the summer and spring, but generally at any time of the year. Mix about 30 g of regular fatty cheese with 2 tablespoons of milk, heat to body temperature. Bring mass to a homogeneous, lump-free mixture. Apply the resulting mask to the skin for 15 minutes. Clean with warm water.
Formula # 6. Normal skin moisturizing mask
Use a grapefruit mask to moisturize normal skin. To do this, mix the chopped pulp of two slices of grapefruit with 1 egg yolk. Apply mask to skin for 15 minutes. Then rinse with warm water.
Homemade firming and cleansing mask
A cleansing and firming mask that promotes general health, activates subcutaneous circulation and cleans pores on the face from sebum production, giving a youthful look.
Formula # 7. Firming mask for oily skin
Oily skin becomes perfectly toned thanks to the mask of white clay. To prepare, dissolve 2 tablespoons of white clay in cool boiling water, add 1 egg white, 3-4 drops of lemon juice and 5 ml of honey. The resulting homogeneous mass should be the same as sour cream in terms of consistency. Place the mask on your face and wait until it is completely dry. Wash off the clay mask with warm water as soon as it is completely dry.
Formula # 8. Purifying Mask for Dry Skin
Dry skin is visibly improved and cleaned thanks to the action of white clay. To prepare the mask at home, take 1 teaspoon of white clay, 2 times more milk and 5 ml of honey. Mix until smooth and apply on face. After 10-15 minutes, wash off the mask and finally, after washing the face, use a moisturizer.
Formula # 9. Tightening mask for normal skin
Normal skin will quickly return to a youthful and toned look with the lemon peel mask. Stir in 1 yolk and 20 ml of low-fat sour cream, add 1 grated lemon. Keep the mask on for no more than 30 minutes.
Homemade skin whitening mask
Many girls dream of getting rid of freckles and generally whitening their facial skin. At home, a facial whitening mask will help to fade age spots, even age spots.
Recipe # 10. The popular cucumber whitening mask for skin whitening has good effect. Grind a medium-sized (seed-free) cucumber puree and mix with your daily cream or sour cream. Apply the mixture to your face for 20 minutes. Clean with warm water.
Formula # 11. The following whitening mask turns out to be quite loose. At home, mix liquid honey and lemon juice into equal parts by volume. Soak a gauze napkin in the mixture just enough, then apply it on your face. Leave it on for 15 minutes, then remove a tissue and gently rinse your face with water.
Anti-aging Home Mask
Over time, skin begins to age - this is an inevitable process. But when wrinkles appear the first problem, should not lose heart but should include in the rejuvenation process in regular skin care. Regular use of an anti-aging collagen mask allows you to delay the appearance of new age-related changes on your facial skin and smooth out existing small wrinkles.
Formula # 12. Aloe vera facial rejuvenation masks are very popular at home. Combine one tablespoon of this plant's juice with the same amount of premium face cream and vegetable oil (preferably olive oil). Stir and apply a slightly warm mask, keep on face for 10 minutes.Recipe # 13. In the summer you can make a mask from the fresh leaves. Blend the leaves into porridge and mix with honey into equal parts. If the mixture is too thick, like a thick paste, dilute a little with water. Keep this mixture on your face for at least 15 minutes. First, remove it with a damp gauze, then rinse your face with cool water. And don't need botulinum toxin.
The mask works to lift facial muscles at home
The fight against facial sagging requires the constant attention of women over 30. Therefore, when the skin begins to fade, you need to equip yourself with proven means to helpalign the upper layer of the epidermis.
Formula # 14. This vitamin anti-aging mask is prepared at home from medicinal ingredients.
Element:
- 1 tbsp round pink clay,
- 1 tube of vitamin A
- 30 ml brewed unscented green tea.
Gently dilute the dry clay with tea and stir continuously so that the mass forms a homogeneous texture. Add vitamin A and apply the entire mixture to the skin. The mask lasts 25 minutes. Regular use of this formula will restore firmness and health to the skin.
Rinse this mask with plenty of cool water.
Formula # 15. Natural and effective muscle lift can be observed in egg whites. Whip a protein into a hard foam and mix with two teaspoons of soaked oatmeal. The contact time of the mask on the skin is 15 minutes.
According to girls, it has a muscle lifting effect: firm skin.
How to properly mask at home
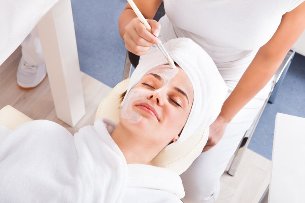
Before applying any type of mask, you should clean your face with makeup with a gentle makeup remover. Refreshing gels usually complete the makeup removal process, but you can use an extra layer of peeling.
Prior exfoliation is desirable so that all substances that make up the mask penetrate well into the face skin, which will ensure the highest efficiency. Rubbing, for example, can also be used at home, according to any coffee-making recipe.
When applying a mask, follow these general rules for home cosmetic recipes:
- Cannot perform the masking application process "while running". Put aside all household chores and spend only half an hour for yourself.
- Any effective homemade mask should be prepared (mixed) right before use. The remaining volume cannot be stored.
- All ingredients of the mask must be of good quality and ingredients like sour cream, fruit, kefir, etc. v. , must be fresh.
- Before applying the mask, the face must be cleaned in the normal way. People with oily and combination skin may also need a preliminary exfoliation. After cleaning your skin, open up pores as much as possible, either steam through a bath or a warm compress. This will allow all ingredients to be absorbed as much as possible and have the best effect.
- To keep the hair from obscuring the face, tie it into a bun and fix it with something.
- A mask should be applied, depending on the consistency, with clean hands, a brush, gauze pad or cotton pad.
- Most masks should not only be applied to the face, but also to the neck and genital area. An exception would be a drying mask for oily skin, as in dry areas skin is much drier.
- Apply homemade masks in a massage line, performing movements from the center of the face to the temples. The one exception is the skin directly around the eyes, you don't need to wear a mask.
- Rinse the mask with clean water. It is better not to take it from the tap, but to prepare a pot of boiled water to cool with body temperature in advance.
- After cleaning the mask, you do not need to wipe your face, use a clean towel to gently blot excess moisture. On the damp face, apply cream suitable for your skin type.
- Don't expect immediate effect from the first process. Homemade masks should be repeated as often as 1-3 times a week. Course duration is at least 3 weeks.
Cautions when using a mask at home
For girls who are prone to allergies, before applying the prepared mask at home, it is imperative to perform the test on the wrist or the inside of the elbow. If signs of an allergic reaction appear, take an antihistamine and do not use this product.